Summary:
Step 1: Complete Surface Assessment and Cleaning
Before any brush touches your walls, we need to understand exactly what we’re working with. Every surface reveals its history—previous paint failures, moisture infiltration, and structural issues that demand attention before proceeding. Your Nassau County home faces specific challenges from coastal humidity, salt air, and dramatic temperature fluctuations that create specific preparation requirements.
We begin with a thorough inspection that examines loose or peeling paint, structural cracks, surface holes, mildew growth, and any indicators of moisture damage. This isn’t a casual walkthrough—it’s a detailed evaluation that determines every subsequent preparation step. Different substrates tell different stories, and experienced painters know how to read these signs.
The cleaning phase removes accumulated dirt, grease deposits, mildew colonies, and chalky residue that prevent proper paint adhesion. Wood surfaces harbor tannins that bleed through paint coats. Vinyl siding accumulates environmental contaminants that affect bonding. Masonry surfaces develop efflorescence that interferes with adhesion. Each substrate requires specific cleaning approaches, but the objective remains consistent: creating an immaculate foundation for your new finish.
Professional residential painting demands recognizing substrate compatibility. Oil-based paints react differently with latex topcoats. Multiple existing paint layers create adhesion challenges. Temperature and humidity levels during application affect curing and final appearance. These variables can’t be addressed without proper initial assessment.
Why Most Painting Contractors Skip Thorough Surface Assessment
Time constraints and competitive bidding create powerful incentives to accelerate this fundamental step. Many painting contractors calculate estimates based purely on square footage measurements, without investing time in extensive surface evaluation. This approach creates problems for everyone involved.
Homeowners experience paint failure within months rather than years. Contractors face expensive callbacks, warranty claims, and damaged reputations. The apparent “savings” from abbreviated assessment evaporate when projects require complete redoing. Nassau County’s coastal environment amplifies these risks through salt exposure, humidity extremes, and thermal cycling that standard preparation methods can’t address.
Surface-Specific Cleaning Techniques That Actually Work
Wood surfaces, particularly cedar and redwood, common in Nassau County architecture, contain natural tannins that migrate through paint films if not properly sealed. Pressure washing alone cannot address tannin bleeding—it requires specific cleaning solutions and compatible primer systems.
Vinyl siding expands and contracts with temperature changes, and improper cleaning techniques can damage the surface or force water infiltration behind the siding. Metal surfaces, especially wrought iron features prevalent in Long Island homes, require rust assessment and treatment that addresses both visible corrosion and underlying oxidation processes.
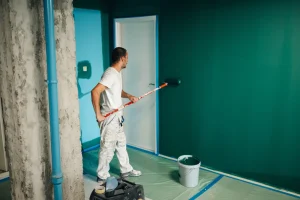
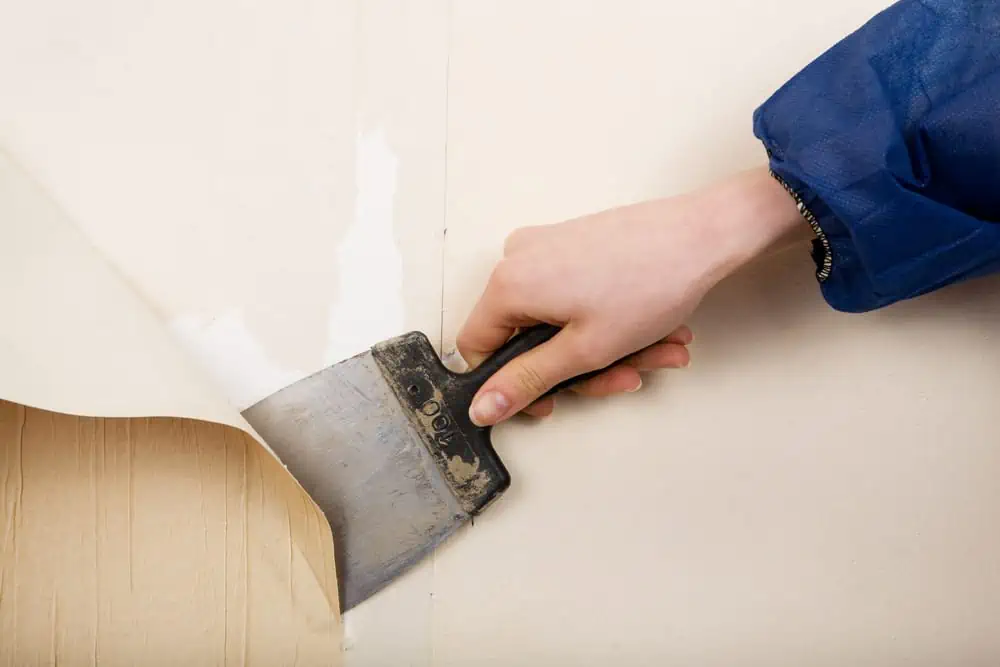
Step 2: Repair and Surface Smoothing
Once we understand your surfaces and they’re thoroughly cleaned, the detailed preparation work begins. This step distinguishes quality painting contractors from those prioritizing speed over lasting results. Every crack, hole, and surface imperfection requires attention—not because of perfectionism, but because paint amplifies flaws rather than concealing them.
Professional repair work considers the substrate material, environmental conditions, and expected paint performance. Wood repair in Nassau County’s climate requires identifying seasonal movement patterns. Drywall repairs must account for humidity fluctuations that affect compound adhesion. Masonry repairs need compatibility with existing mortar compositions and thermal expansion characteristics.
Different materials demand different repair approaches. Exterior wood repairs often require epoxy-based compounds that bond permanently and flex with weather-induced movement. Interior drywall repairs need lightweight compounds that sand smoothly and accept paint uniformly. Plaster repairs in older homes require compatible materials that bond with existing lime-based substrates.
Caulking is a crucial element that is often overlooked. Proper caulking prevents water infiltration, creates clean sight lines, and accommodates normal building movement. Paintable acrylic caulks work well for most interior applications, while polyurethane or silicone formulations handle exterior exposures to weather and UV radiation.
Wood Repair Techniques for Long Island Weather
Wood movement creates ongoing challenges in Nassau County’s variable climate. Humidity swings and temperature changes cause constant expansion and contraction cycles. Repair materials must accommodate this movement or they’ll crack and separate from the substrate.
Traditional wood fillers work adequately for minor holes and surface imperfections, but larger repairs require different approaches. Exterior applications need epoxy-based products that create permanent bonds and won’t shrink or crack with seasonal changes. Window and door trim receive particular attention because these areas experience maximum movement and weather exposure.
Step 3: Proper Priming for Maximum Adhesion and Durability
Primer serves multiple critical functions beyond simple surface preparation. It seals porous substrates, blocks stains from bleeding through finish coats, and creates uniform adhesion characteristics across different surface materials. Different substrates require different primer formulations to attain optimal results.
High-build primers help level minor surface irregularities while providing uniform sealing across repaired and unrepaired areas. This prevents the “flashing” effect where repairs show through finish coats as dull or glossy spots. Specialized primers block tannin bleeding from wood, nicotine stains from interior surfaces, and rust staining from metal components.
Achieving Professional Results Through Proper Surface Preparation
These three fundamental steps—comprehensive assessment and cleaning, thorough repair and smoothing, and appropriate priming—determine whether your paint job achieves professional appearance and longevity. Compromising any step undermines the entire project, regardless of paint quality or application technique.
The distinction between amateur and professional results isn’t the paint itself—it’s everything that occurs before paint application begins. Quality preparation requires time and costs more initially, but it’s the only method that produces finishes worthy of your investment. Contact us today to experience the difference that proper preparation makes in your Nassau County painting project.